Would you like to synchronize the product quantity across your shop sites that belong to the same WordPress Multisite Installation? Then Central Stock for WooCommerce is the perfect choice for you.
Table of Contents
What exactly can Central Stock for WooCommerce do?
Multi Shops
When you create an ecommerce shop through WooCommerce, you can also create all the products needed for your business. Each product on the site refers to a physical product usually stored in a warehouse (unless it is a virtual good like music or software).
The available amount of a specific product, known as Stock Quantity can be managed by WooCommerce: you can insert and update the value and, WooCommerce also automatically decreases the quantity when a customer purchases the product.

A problem occurs when the owner decides to work in a WordPress Multisite environment, creating several sub-sites and setting up several shops. This can happen for example when needing to serve the same products for customers located in different countries or speaking different languages.
This kind of configuration is possible and allows the owner to take advantage of light sites with better performance. They are easier to maintain, less complex, and give fast response to the users.
While each WooCommerce installation on each sub-site has a separated stock quantity management, we have only one physical warehouse. This leads to a logistic problem because any purchase must always deal with the actual products available.
Central Stock
Central Stock solves exactly this problem: you can relate the actual quantity of the same product as physically available in the warehouse, across all the shops. In this way, when the shop manager updates the Stock quantity in one site, this value will be synchronized in all the shops. But also when a customer purchases the product in one site, the whole stock quantity will be decreased in each shop. This is the result of a centralized stock value creation to which the products refer to.
Together with the stock quantity, the related properties “manage stock” (setting quantity) and “stock status” (shows product status to the customer), will adapt too.
This way the user could be able to take advantage of the synchronization effect in a smooth and transparent way.
Central Stock for WooCommerce and MultilingualPress
Central Stock doesn’t require MultilingualPress to manage the stock quantity, but it is true that together with WooCommerce, MultilingualPress and Central Stock a comprehensive solution for your international multi shop system is provided.
With a WordPress Multisite Network and WooCommerce you sell your products by building several shops; with MultilingualPress you sell professionally without language or country boundaries.
Central Stock perfectly integrates in this environment letting you manage your international shops easily, and hence giving you the freedom to focus exclusively on what really matters: your business.

If you want to know more about MultilingualPress you can have a look at the Getting Started with MultilingualPress 3 guide.
Is there a demo version of Central Stock for WooCommerce?
This is not available yet, but we will set up a demo soon.
What are the requirements for using Central Stock for WooCommerce?
To install Central Stock for WooCommerce, you need:
- An installed version of WordPress Multisite with WordPress >= 4.9.9
- WooCommerce >= 3.5.4 preferably Network installed but activated on each subsite
- PHP version >= 7.0
If you don’t have WordPress Multisite yet, please follow our guide Installing and setting up WordPress Multisite. You can find more tutorials for WordPress Multisite in our guide WordPress Multisite 1×1 that is hosted in the documents section of our MultilingualPress site.
Installing Central Stock for WooCommerce
- After you have purchased Central Stock for WooCommerce, please log in to your customer account and download the product.
- Go to My Sites → Network Admin → Plugins, upload the plugin and activate it across the network.
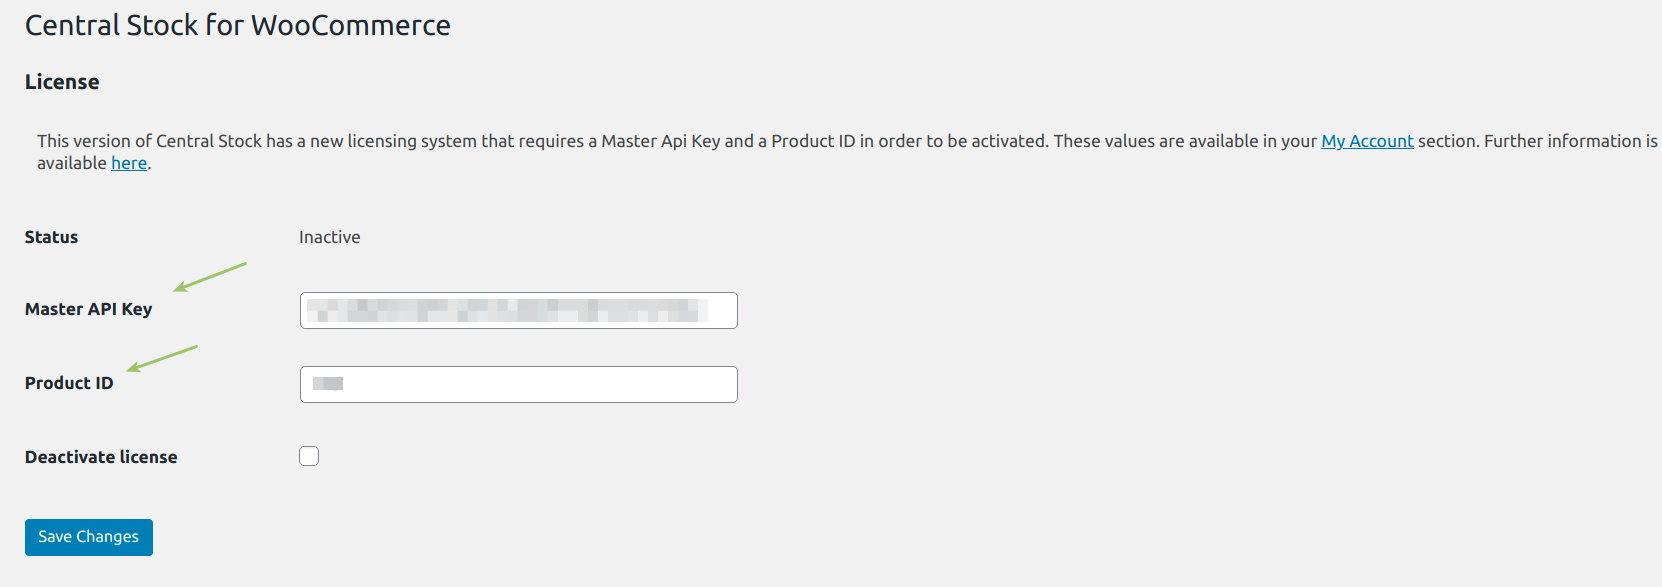
- Then go to My Sites → Network Admin → Settings and then on the Central Stock settings page enter your Master API Key and Product ID. These can be found in your customer account.
Create shops within the multisite
As an example let’s set up some shops in the Network.
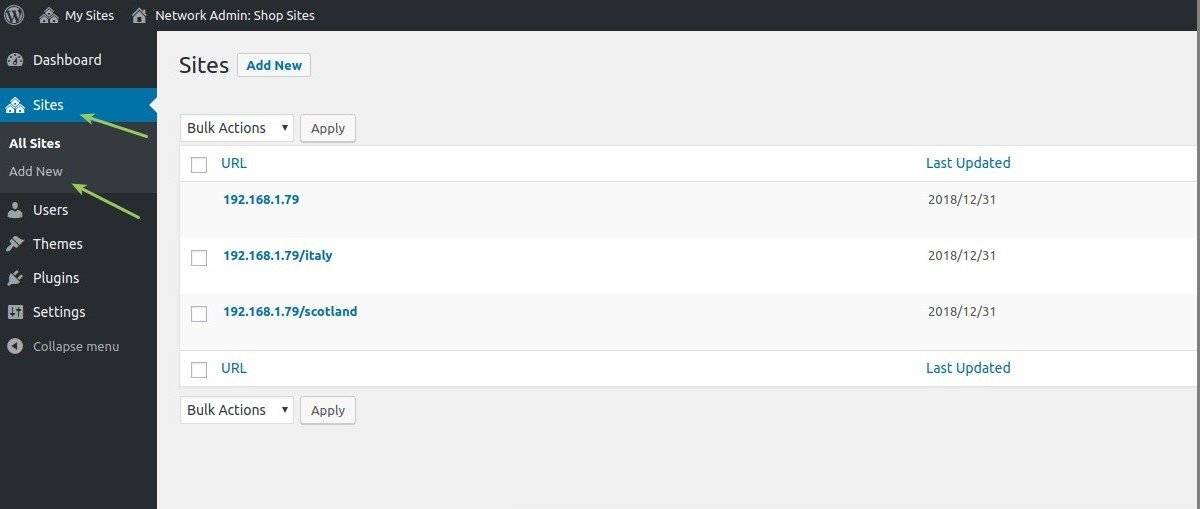
- Go to My Sites → Network Admin → Sites and click on the button Add New.
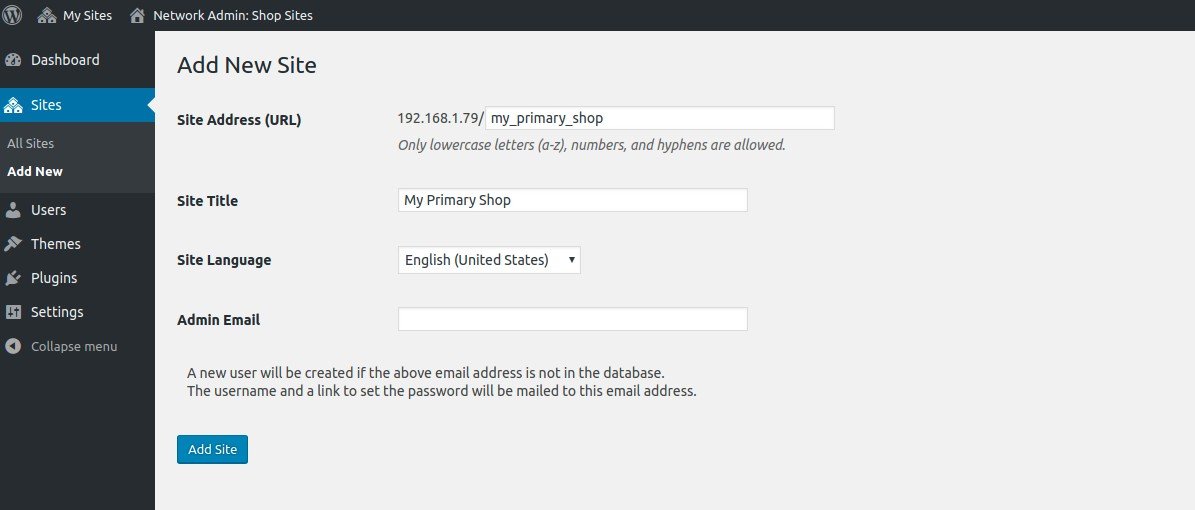
- On the appearing settings page, enter the following information:
- Site Address (URL)– the URL of your new website; in this example we refer to it as my-primary-shop
- Site Title – This will be displayed in the Admin menu and potentially on the frontend as well. In this example we refer to it as My Primary Shop
- Site Language – In this case, this is the backend language for the site
- Admin Email – the email of the site admin
- Proceed creating two more sites the same way and addressing them as my-secondary-shop and my-tertiary-shop in the URL and as My Secondary Shop and My Tertiary Shop in the Site Title
Create a product in each site and synchronize Stock Quantity
The Network installed WooCommerce plugin must be activated in the subsites. Afterwards, add and create products to your sites. To connect the same product between shops, you need to set the same SKU value on each site. Let’s have a closer look.
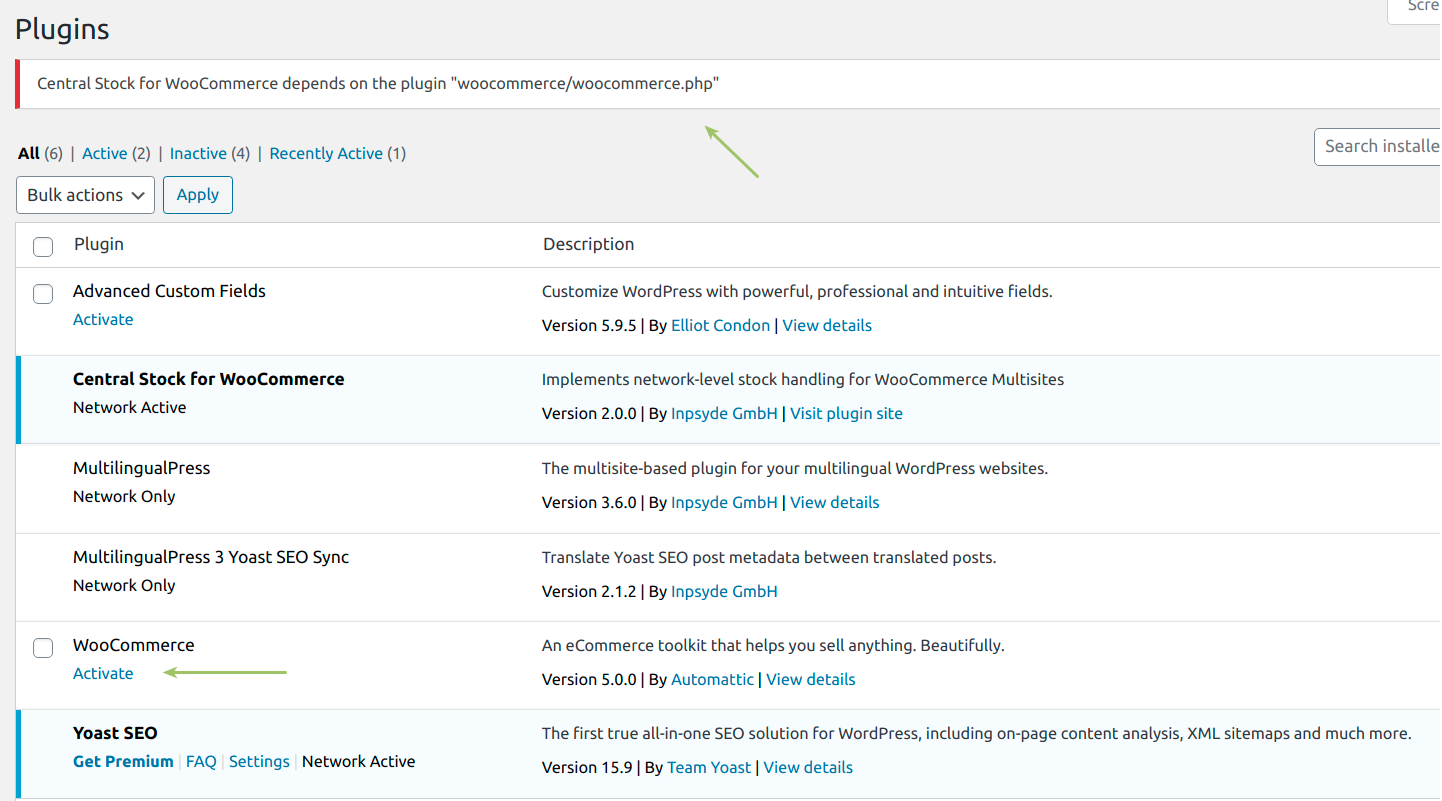
- From the My Primary Shop dashboard, go to Plugins. Here, a warning at the top of the page alerts you that Central Stock needs WooCommerce to be activated. So click on the Activate link for the WooCommerce plugin.
- Similarly as in the previous step, activate WooCommerce in My Secondary Shop and in My Tertiary Shop dashboard.
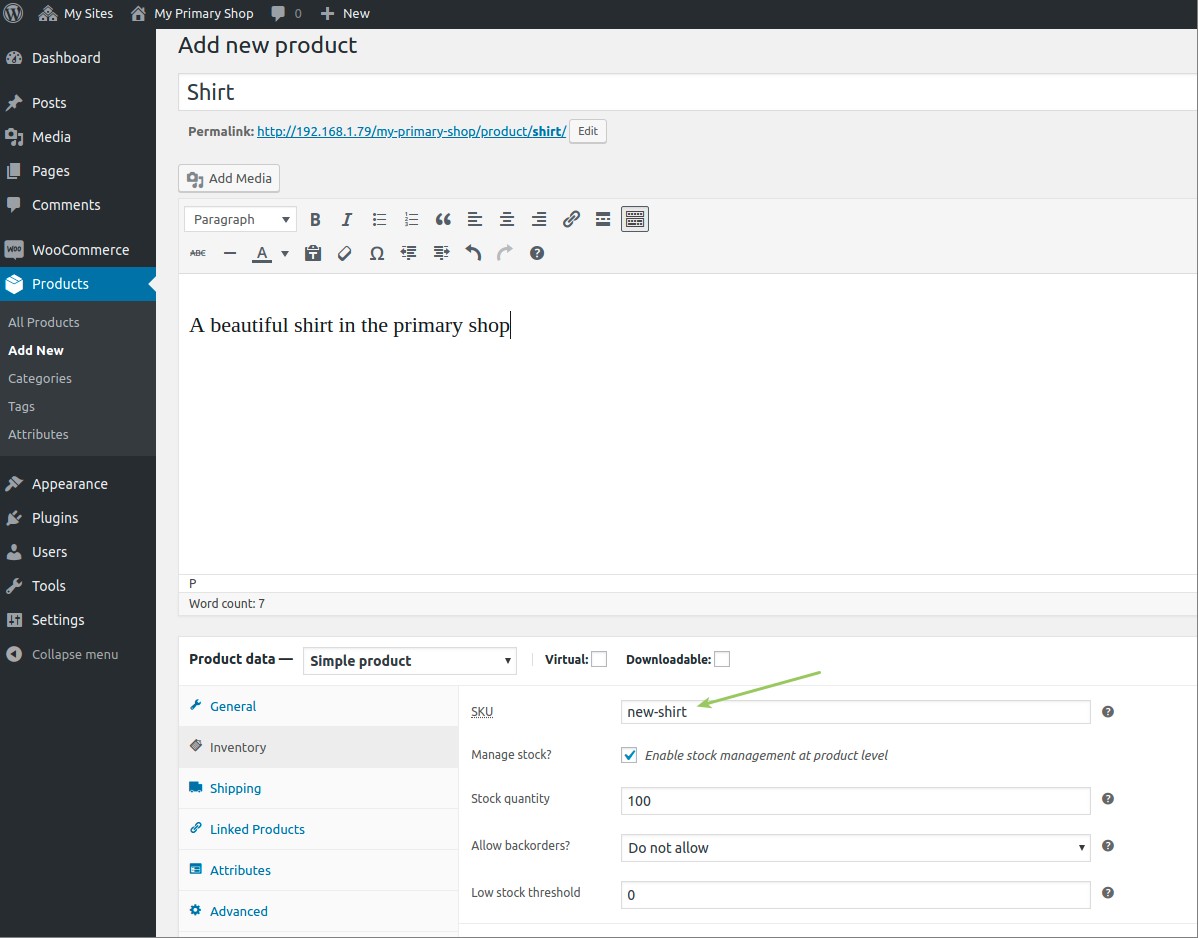
- Now, from the My Primary Shop dashboard go to Products and click Add New and proceed creating a new product. In the picture below we add a shirt as a new simple product, assigning the SKU value new-shirt. We also select the checkbox Enable stock management at product level and set the Stock Quantity to 100.
- Similar to the previous step, create a simple product in My Secondary Shop and in My Tertiary Shop remembering to use the same SKU value new-shirt. After that, test the functionality by trying to change the related Stock Quantity in one site of your choice and then check the other sites: their values will update accordingly to the change. Just using the same SKU value lets you synchronize the Stock Quantity between all the products across the shops.
- We can also test the feature by trying a purchase: if we buy one product item in My Secondary Shop the related product in My Tertiary Shop will decrease by the same quantity.
